Making a
"Brightness" Blow-Up
(Part
of
the
Expanded
version
of
Defect
#
7)
New
10-9-10
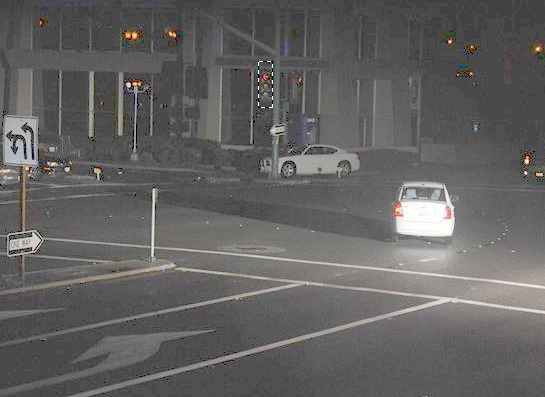
There will be two "scene" photos there.
One photo will be of your car just a little bit behind the limit line. Click on it to enlarge it as much as possible, and then right click to save it to your computer. We will call that one, Scene A.
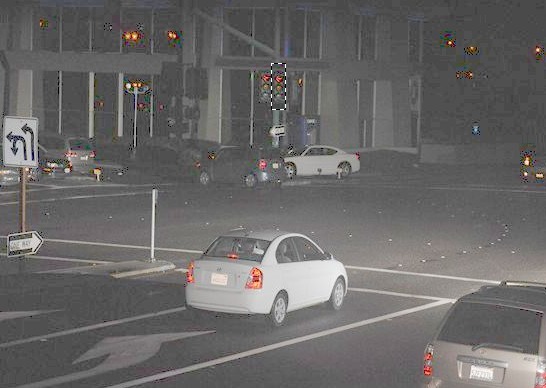
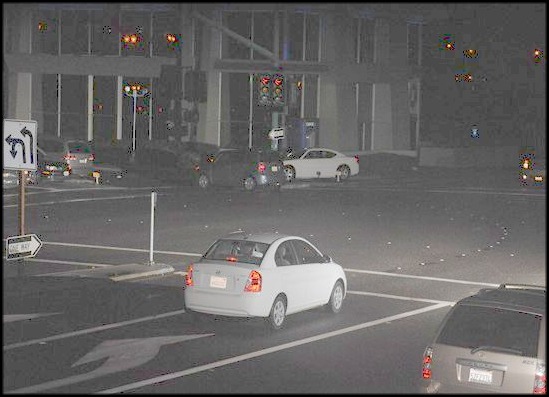
Scene B will be of your car out in the middle of the intersection. Enlarge and save it, too.
| If the camera company's website will
not allow you to save the photos: Tap your "Print Screen" button (upper right corner of your keyboard) to copy an image of everything you are looking at on your screen - included the "scene" photo you want - into your "paste" buffer. (I don't know why the button is called Print Screen - it doesn't start any printing process.) Then open up your painting program (included with most software packages), use Ctrl-V to paste* the screen image into your painting program as a new image. (This image may "fake you out" as it will include a picture of the menu and task bar you were looking at a few minutes before, but if you click on those menu or task bar items, nothing will happen!) Then cut out the portion you want, label it as Scene A or Scene B, and save that picture somewhere convenient. If you are given a choice, I recommend saving the picture as a bitmap file (.bmp). *Note: I am not an artist, by any means - you can tell it from the look of this website. I use an old edition of Paintshop Pro - simple enough so that I can understand it. But it will not allow me to import or paste images I have obtained via "print screen," so to do that I briefly switch over to using Microsoft Paint, which came bundled with other software. |
(Much of the rest of these
instructions is based on using Paintshop Pro.)
Open your painting
program
and click file>open, then browse to to the Scene B photo (wherever
you saved it on your computer), and click open.
Click on your
"select" or "selection" tool (a dotted rectangle) and use it to outline
a small, narrow
rectangular portion of Scene B, around the red light, like this:
Click Ctrl-C to copy the outlined image into your paste buffer.
Then open up Scene
A, and paste (Ctrl-E) the small image you took from Scene B right next
to the Scene A signal.
To get rid of the
dotted outline, move your cursor to any other location on the picture,
and click one more time. Now you should have a picture with TWO
signals, like this:
Switch over to your
magnifier tool, and enlarge the twin signal heads as much as
possible. This is 16 to 1.

With the pixels so
large, it is easy to see - and point out to a cop or a judge - the
greater number of bright (light pink) pixels in the signal head
imported from Scene B. Sometimes - although not in this case -
you can also see evidence that the Scene A yellow light hasn't
quite
gone out. In this picture, the yellow and green lights serve as a
reference point - their brightness is unchanged between Scene A and
Scene B, whereas the red light is brighter.
To save the
pixelated image for later use, use your "Print Screen" button
(upper right corner of your keyboard) to
copy an image of everything you are looking at on your screen -
included the pixelated image - into your "paste" buffer.
Then open up your painting program, and use Ctrl-V to paste the screen
image
into your Paint program as a new image. (My old edition of
Paintshop
Pro will not allow me to import images I have saved via "Print
Screen," so to do this I switch over to Microsoft Paint.) Once
your painting program displays the "print screen" image, it may "fake
you out"
as it will include a picture of the menu and task bar you were looking
at a few minutes before, but if you click on those menu or task bar
items, nothing will happen.
Using your painting program's "select" tool, outline the portion you
want, copy it
(Ctrl-C) into your paste buffer, then paste (Ctrl-V) it back in as a
new image, and then save (file>save as) that picture where ever
you want it.
Doing a Blow-Up from the Video
You could also do a blow-up from frames of the
video. But the video available on the camera company's website is
greatly reduced in resolution and in frame speed, from the original. To
get a copy of the full-resolution, maximum frames-per-minute video,
file a Discovery request. See my Getting Records page. Be
prepared to have to repeat your request, and to drag the police into
court if they tell you that the online
video is the best there is. You are entitled to Discover the
video - because it can be "exculpatory evidence" - it could show that
you are innocent.
Doing a TBD
Contact me for sample TBDs.
---------------------------------
RED LIGHT CAMERAS
www.highwayrobbery.net
www.highwayrobbery.net